
Next step is File, New, Blank File which brings up a dialog box. I usually make it larger than what I need, I can always shrink the image before printing. So, I made mine 5 inches by 5 inches with Resolution of 300 pixels/inch and Transparent Background Contents. It is very important that the Resolution of your New Blank File matches the Resolution of the images you are working with.

I click OK and this gives me a new blank image to work on. I double clicked on Sean w/dog down in the Project Bin on the bottom to bring him back into the workspace. Then using the Move Tool, I clicked on the image and dragged him off the paper, dropping him on my blank file in the Project Bin.

As you can see below, he is quite a bit bigger than my blank file. If you hit Ctrl 0 it will re-size the workspace so you can see the outer bounding box of Sean w/dog. I just grab a corner with the Move Tool and drag it in until he is the size I want.
Next step is to bring Sean w/slingshot into the new image. Same deal, double click Sean w/slingshot to bring him back into the workspace, using the Move Tool, drag him off the page and drop him on top of the new image.

Again, he is larger than the new image size so I will have to grab the corners and make him an appropriate size.

Now I can decide where I want the boys and who I want in the foreground. To move an image forward or back, simply right click on the image and select the option you want.

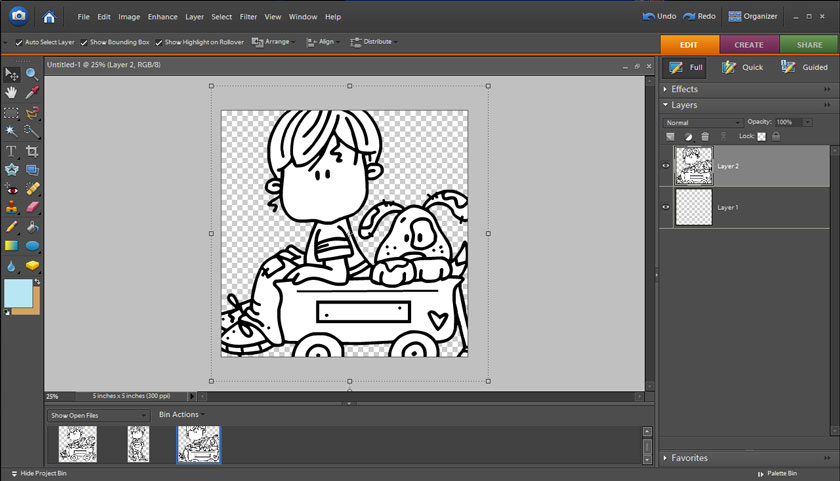
I decided we needed a girl in the mix, so I opened another Bugaboo Brat, Desiree and as before, with her in the active workspace, using the Move Tool I dragged her off the page

And dropped her on top of the boys.

Once again, using the Move Tool, I grabbed a corner and sized her to match the boys. Always use a corner to size as it will size both the height and width proportionally. I did some rearranging and shuffling and came up with 3 kids enjoying a summer day. Come back on Saturday to see the card I make with them.

For more great tutorials, visit the Bugaboo Catch the Bug Challenge Blog.
8 comments:
Wow! I hope I can learn how to do this - Thanks Sandy!!!!!
Sandy D
Thanks for the posting Sandy! I will be following the directions on this one! I'm really starting to like these digital images!
Elise G
Thank you very much for the tuorial on merging these images. I will be trying it out tonight.
Thanks again,
Dona Mac
Fab fab fab tut, shame I dont have photoshop though :(
If you know if this can be done without a special software package - Id love to know!
Keryn x
Thank you, thank you, thank you
Sandy--thanks so much for doing this tutorial. I have so wanted to learn to do this. I will definitely have to try it.
Sandye
Of course, you'd create a fan-freakin'-tastic tutorial! I've bookmarked it. We've got Adobe Photoshop at home, so now I just have to get brave and open it. . ;) MWAH!
awesome!! now just need to work on dh so i can get PS ;)
Post a Comment